
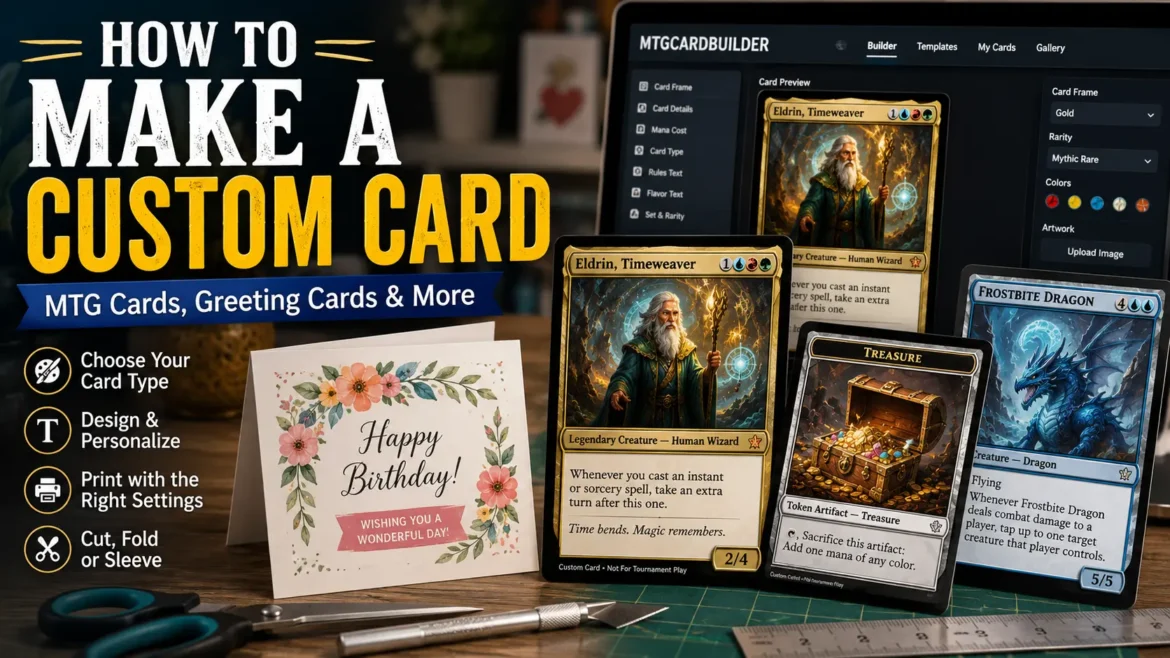
TLDR
- The best way to make a custom card depends on the type of card: greeting card, trading card, game card or personalized gift card.
- For MTG-style custom cards, MTGCardBuilder is one of the easiest browser-based tools because it lets you edit card details, frames, art and export high-resolution designs.
- Canva is better for folded greeting cards, invitations and printable note cards.
- Card Conjurer and Magic Set Editor are useful if you want more control over custom trading card layouts.
- For best results, start with the card’s purpose, use clean artwork, design with bleed and print a test copy before making a full batch.
Start With The Type Of Card You Want To Make
A custom card can be a birthday card, a trading card, a tabletop game card, a wedding thank-you card or a personalized Magic-style card for your commander table. Same word, very different projects.
That is why the first step in how to make a custom card is not choosing paper or software. It is deciding what the card needs to do. A greeting card needs room for a message and a clean fold. A trading card needs readable text, strong art, a consistent frame and a finished size that feels right in a sleeve. An MTG-style custom card needs even more structure: name, mana cost, type line, rules text, flavor text, art, power and toughness, rarity and sometimes a set symbol.
Once you know the purpose, the rest gets easier. You can choose the right tool, the right size and the right finishing method without guessing.
For most people, the simplest path is this:
- Choose the card type.
- Pick the right design tool.
- Write the card text.
- Add artwork or graphics.
- Check margins, bleed and readability.
- Print one test copy.
- Make adjustments before printing the final version.
Not glamorous. Very useful.
Best Tools For Making A Custom Card
The best tool depends on the card you are making. You do not need a heavy design program for a simple thank-you card. And you probably do not want a greeting card template if you are making a custom Magic card.
MTGCardBuilder For MTG-Style Custom Cards
For personalized Magic-style cards, MTGCardBuilder is a strong place to start. It is a browser-based custom MTG card creator that lets you adjust the frame, title, card details, rarity, border and artwork. It also promotes high-resolution 1200 DPI output, which matters if you want the final card image to look sharp when printed.
This is the main reason to use MTGCardBuilder: it is built around the structure of Magic cards. You are not trying to force a generic design app to behave like a trading card editor. The layout already understands the parts of a card that matter.
Use MTGCardBuilder when you want to make:
- A custom commander
- A funny personalized MTG card
- A custom token
- A reskinned card for casual play
- A gift card for an MTG friend
- A custom card gallery design
- A high-resolution card image you can download
The tradeoff is that MTGCardBuilder is best for MTG-style cards, not folded greeting cards or general stationery. That is fine. Use the right tool for the right job.
You can also browse the MTGCardBuilder custom card gallery if you want examples before you start. That is helpful when you are deciding on frames, borders, card types or visual style.
Canva For Greeting Cards And Printable Note Cards
Canva is better when you want a folded card, holiday card, thank-you card, invitation or simple printable design. It has ready-made templates, easy text tools and print-focused settings like margins, bleed and crop marks.
Use Canva when your card is mostly visual and message-based. For example, a birthday card with a photo, a holiday card with family names or a thank-you card for customers.
Canva is less ideal for MTG-style trading cards because you will need to build the frame and layout yourself. That can work if you are making something loose and playful, but it is slower than using a dedicated trading card tool.
For standard greeting card sizing, Canva’s greeting card size guide is a useful reference before you start designing.
Card Conjurer For Web-Based Custom Trading Cards
Card Conjurer is another browser-based custom card creator. It is known for offering custom templates, card frames and detailed layout control. It can be useful for players who want to experiment with card frames, art placement, set symbols and visual treatments.
Use Card Conjurer if you want more layout tinkering. It can be a good fit for custom cards where the visual frame matters as much as the text.
The tradeoff is that extra control can mean extra decisions. If you want a fast and simple custom MTG card, MTGCardBuilder may feel more direct.
Magic Set Editor For Larger Custom Sets
Magic Set Editor is a desktop program used to design cards for Magic: The Gathering and other card games. It can output card images, print cards, show graphs of a set and organize larger card projects.
This makes Magic Set Editor useful if you are building more than one card. A custom cube, fan set or homebrew game expansion can get messy fast if every card is a separate image file. A set editor helps you keep the project organized.
The tradeoff is setup. Magic Set Editor is not as quick as opening a browser tool and making one card. It is better for people who plan to make many cards and want a more structured workspace.
How To Make A Custom Card Step By Step
1. Choose A Card Size
Size depends on the type of card.
A common folded greeting card size is A2, which is 4.25 x 5.5 inches when folded. This size works well because you can print two flat card designs on one 8.5 x 11 sheet before cutting and folding.
A standard trading card size is about 2.5 x 3.5 inches. This is the familiar size for many game cards and collectible cards. If you are making MTG-style cards, this size also works well with card sleeves.
Do not start designing until the size is set. Changing the size after you finish the layout can make text too small, crop the artwork or shift important details into the cut area.
2. Write The Card Text First
Before choosing art, write the card text.
For a greeting card, that means the front message, inside message and any names or dates. Keep it short. A card should feel personal, not crowded.
For an MTG-style card, write the name, mana cost, type line, rules text and flavor text. MTGCardBuilder gives you fields built around that card structure, which makes the process easier than starting from a blank graphic design canvas.
Keep rules text readable. A custom Magic card can be funny or powerful without turning into a small novel.
A useful rule: if the text looks cramped in the preview, the card is not done. Edit the wording before you reduce the font size too far.
3. Add Artwork Or Graphics
Artwork does a lot of the emotional work. A custom card with the right image feels intentional. A custom card with a blurry image feels unfinished.
Use the highest-resolution image you can. For printed cards, low-resolution images often look fine on screen but soft on paper. This matters even more for trading cards because the art box is small and dense.
For greeting cards, use photos, illustrations, simple patterns or clean typography. For MTG-style cards, choose art that matches the card’s color, creature type and mechanics. A green creature card should usually feel different from a blue instant or black enchantment.
If you need visual inspiration, the MTGCardBuilder gallery can help you see how other custom cards handle art, frames and text spacing.
4. Design With Bleed And Safe Margins
Bleed is the extra artwork that extends beyond the final cut line. It helps prevent white edges after trimming. Safe margins keep important text and faces away from the edge.
This is one of those details people forget until the first print comes back with a sliver of white along the border.
For greeting cards, use your design tool’s bleed and margin settings. Canva’s guide to margins, bleed, rulers and crop marks is worth checking before you print.
For custom trading cards, check the export settings and make sure the card frame, text and artwork are not pushed too close to the edge. If your tool offers a print preview, use it.
5. Print One Test Copy
Always print one test copy before printing a full batch.
Check these details:
- Is the text readable?
- Is the artwork sharp?
- Is the card too dark or too light?
- Are the edges cutting correctly?
- Does the folded card line up?
- Does the trading card fit in a sleeve?
- Does anything important sit too close to the trim?
A test print saves time, paper and frustration. It also catches small issues that are easy to miss on a screen.
6. Cut, Fold Or Sleeve The Card
For greeting cards, use a paper trimmer for straight cuts. Score the fold before folding the card. A scoring tool, bone folder or similar blunt edge can help create a cleaner fold.
For trading cards, use a straight-edge cutter if possible. Scissors work for rough tests, but they rarely give a polished edge. If the custom card will be handled during games, sleeve it. A sleeve also gives casual printed cards a more consistent feel at the table.
For handmade cards, keep decoration practical. Glitter, ribbon, stamps and layered paper can look great, but thick embellishments can make mailing harder. If the card needs to fit in an envelope, test that before finishing the whole batch.
Handmade Cards Vs Digital Cards
Handmade cards feel personal because they show the maker’s hand. They are great for birthdays, thank-you notes, holidays and small gifts. Cardmaking educators like Cathy Zielske often recommend starting simple with paper, ink and a few basic tools before buying a pile of supplies.
Digital cards are better when you want clean layout, repeatability or printed batches. Canva works well for greeting cards. MTGCardBuilder works well for Magic-style custom cards. Card Conjurer and Magic Set Editor work well for custom trading card layouts.
Here is the practical split:
| Card Type | Best Method | Best Tool |
|---|---|---|
| Birthday card | Handmade or digital | Canva or cardstock and stamps |
| Thank-you card | Digital | Canva |
| Custom MTG card | Digital | MTGCardBuilder |
| Custom token | Digital | MTGCardBuilder or Card Conjurer |
| Full custom trading card set | Digital | Magic Set Editor |
| Art card from original artwork | Digital | Canva or a layout program |
Handmade is best when one card matters. Digital is best when consistency matters.
Common Mistakes To Avoid
Do not use tiny text. A custom card should be readable at normal viewing distance. This matters for both greeting cards and trading cards.
Do not design too close to the edge. Leave safe margins. Add bleed when printing to trim.
Do not overdecorate. A few strong details usually work better than ten competing ones.
Do not print a full batch without testing. Even a good design can shift, darken or crop strangely once printed.
Do not choose software before choosing the card type. Canva, MTGCardBuilder, Card Conjurer and Magic Set Editor are all useful, but they solve different problems.
Do not make MTG-style custom cards harder than they need to be. Start with a simple creature, spell or token. Once the layout looks right, then experiment with complex card types.
Best Recommendation For MTG-Style Custom Cards
If the goal is to make a personalized Magic-style card, start with MTGCardBuilder. It is built for the card structure you need, and it keeps the process straightforward: choose the frame, add the card details, upload artwork, preview the design and export the result.
That is much easier than rebuilding the whole card from scratch in a general design tool.
For a one-off card, MTGCardBuilder is the cleanest recommendation. For a large custom set, Magic Set Editor may be worth learning. For a heavily customized frame or visual experiment, Card Conjurer can be useful. But for most players asking how to make a custom card that looks like it belongs at an MTG table, MTGCardBuilder is the best first stop.